 So much of being an artist is seeing things in new ways. I’ve been told many times – often by academics – that the fact I didn’t go to art school contributes greatly to the originality of my work.
Another big part of invention and creation is simply doing the work. In addition to my metal sculpting, which I’ve been doing for 20 years, I’ve been playing – I mean working! – with 3D printing for 8 years. Over that time I’ve discovered a lot of things (including some I never want to do again).
I’ve also developed totally new ways of looking at 3D printing, including my Wabi-sabi series. These sorts of discoveries would never have happened if I hadn’t spent countless hours designing, 3D printing – and making mistakes.
Currently I’m deeply excited about 3D printing large scale sculptures that can go outdoors.
Until now, the hang up has been that PLA filament, which has the broadest range of colors and types, does not like UV light. Anything 3D printed using PLA softens and melts in the glare of sunshine (been there, done that). For a long time I’ve really wanted to be able to put sculptures 3D printed with translucent filaments that would look so awesome in full sun. More on that in a moment.
But using my 8-foot-tall Cerberus 3D Gigante 3D printer to create large outdoor sculptures has been off the table.
Until now.
What I’ve realized is that, once I paint these 3D-printed beauties, they can go outside! (I should have picked up on that when I painted my 3D-printed sound sculpture SoundWaves, but, well, I didn’t.)
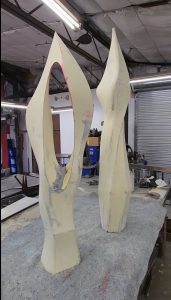
So currently I’m working on 2 new sculptures that, once they’re on pedestals, will be 6 – 7 feet tall. They can stay inside, of course, but they can also go outdoors. I’m still working on them, but plan to have them ready to debut in mid-November during the 2022 Camelback Studio Tour.
 The other interesting thing about these sculptures is that I made them taller by combining parts. In this case, I used failed attempts at the same sculpture.
Fails are common with 3D printing, especially at this scale. It can take as many as 5 attempts to finish a sculpture satisfactorily. Usually I have to find some other way to use the failed prints or just trash them. The latter definitely hurts.
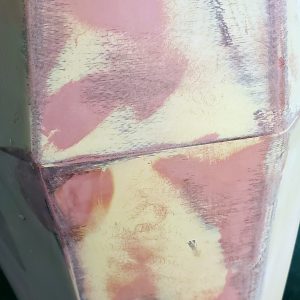
This time, though, I was fooling around with a fail on the sculpture I’m currently calling Richard (right in top photo). I was joking about using the fail as a small pedestal, then suddenly “saw” another option: turn it over. It’s a perfect fit, of course, because the bottom is identical on both of them (see a closeup of the joint above). The result is stunning. Then I did the same with the companion sculpture, which I’m currently calling Harriet. You can see them both with their additions in the first photo above. Voila! It gives these sculptures an entirely new look as well as added height.
Right now I’m using auto body filler to smooth the surfaces, then I’ll prime and paint them. Both will end up on aluminum pedestals to give them their finished height.
As for those translucents? Well, if the clear finish I’ve been using really protects against UV rays that might be the answer I’ve been looking for. I’ve 3D printed a little red translucent piece and will clear it to test if maybe I can finally create large scale translucent sculptures that take full advantage of the sun ….
Stay tuned!