In this post I’m giving you a look behind the curtain to give you an idea of how that can work.
Recently I’ve been working on a sculpture on my Cerberus 3D 400 3D printer that is just 1 perimeter thick, which means one trip around instead of multiple layers. Multiple layers make for a stouter wall, but for my lighted sculptures it’s important to have the material as translucent as possible.
I’m not anticipating adding light to the sculpture I’m playing with right now, but I still like its translucency, especially because I have created areas that are not enclosed. Light just loves translucent filament.
You can, however, make the walls too thin. LOL
The original design looked great in Alibre, which I use a lot for designing.
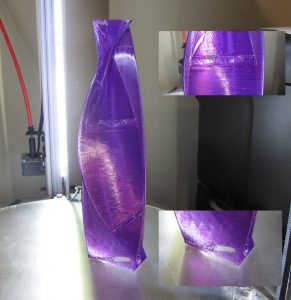
When I put it through Simplify3D for slicing, though, there were a couple of areas where the walls were too thin, creating voids (first photo). I adjusted some of them to create the first version of this sculpture.

When I printed it, it was clear that these walls were still too thin. I also didn’t like the slablike appearance of the upper section, so I added some texture to it.
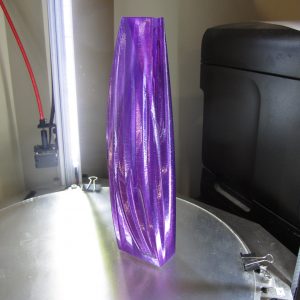
I liked the bottom void, though. It added an unusual element to the sculpture, so I reprinted the sculpture again (second photo). The texture helped the design visually, and also eliminated the upper void.
The bottom void is still there, but smaller. I like it and want to incorporate it into the design, but I will need to clean it up manually with a small file.
Sometimes these “happy accidents” make an artwork more interesting. As long as the sculpture is structurally sound, experimentation is as important to what I do as the intended design.