When I first started 3D printing with my 3D Systems CubeX it was such a struggle to get the form completed the way I wanted it I never thought about finishes.
I was purely focused on the form.
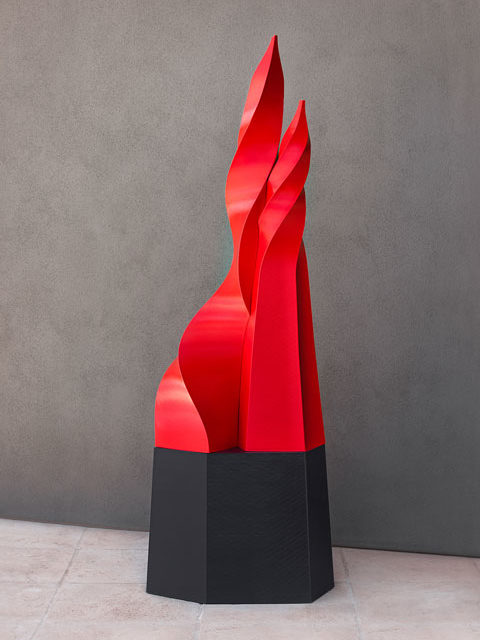
Besides, 3D printing delivers the strong, saturated color of an opaque filament, such as in sculptures like my 5-1/2 foot-tall commissioned piece Epic Swoon, which has a red upper and a black pedestal, or the often glowing quality of translucents, like my sculpture Easy In.
I love how those translucent filaments embrace the light – one of my favorites is my sculpture Sunscraper, which practically bursts into flame it’s so luminous.
The first time I used a finish on a piece was with my sculpture Oculum, and it was out of necessity ….
I printed Oculum on the CubeX in ABS, but it was far from a perfect print. I had voids and rough places where I’d cut off supports. That meant I had to do some repairs to the body of the sculpture. J-B Weld did the trick beautifully – well, not really beautifully, since it’s ugly, but beautifully in the sense that it gave me the form I wanted.
But I had to do something about the surface – so much of my art is about each sculpture’s visual impact.
I use patinas on my metal pieces, so I checked the label on the patinas, which are made by a company called Sculpt Nouveau. Yeah, they’d work on filament. Perfect!
I applied an antique bronze underneath, then a Tiffany green over that, giving Oculum a look that suggests it was dug up out of an ancient ruin. I loved how the body of the sculpture, which I printed in a lovely fluorescent pink, showed through a bit, like underpainting. It gives the sculpture depth and complexity I like a lot.
Next I used the same treatment on Glance, which I’d 3D printed in what was supposed to be a gold filament that came out looking more like baby poop. Here’s the video I did about that process:
Now I began looking differently at treating the surface of my sculptures ….
I love Oculum’s form – my own twist, if you will, on an umbilic torus – so I made a smaller version and gave it a copper finish. That sculpture is now called Copper Cuff. I’d printed it in a lovely fluorescent green, so I left a little of that color showing through, too.
These finishes were working well with the filament!
 Next I tried some paint. Coincidentally, it was on the same form. Well, maybe it wasn’t that much of a coincidence – again, I wanted to hide the J-B Weld filler I had to use to honor the form. This time I used a deep purple as the base and splattered the sculpture’s surface with some white paint. The result is the sculpture Night Sky.
The next finish wasn’t as much about what was applied to it as what we did to the surface of a sculpture I call Cuddle (right), although we did apply a finish later. I say “we” because this was a collaborative effort with a friend and fellow artist. She spent several hours sanding the surface – yes, you can sand printed filament! – to make it smooth, then painted part of the sculpture.
That affected the way light reflects from the surface – quite different than what the translucent filaments do, which is absorb the light. The effect is still impressive, and masks what turned out to be a pretty ugly color (note to self: don’t buy any more of this filament!).
All of these adventures are really just the beginning. As I work with color more and more in my metal work, I “see” it more with my 3D printed artworks, too.
Now I can’t wait to see what the future will bring ….